Monday, October 15, 2012

on demand and configurable Arduino HardwareSerial

At some point you want to tune a hardware serial interface. Typically to increase the receive buffer size because the sender sends fast and you need some time to do other stuff then just receive data.

Sometimes you don't use the serial interfaces at all, or only use it for sending short debug messages.

In all those cases you're potentially wasting quite a bit of RAM as Arduino always instantiates all available serial interfaces with the fixed buffer size of typically 64 bytes.

I thought it a fun little coding challenge to adapt the Arduino HardwareSerial code to use C++ template parameters. Those parameters can then be used to instantiate the HardwareSerial only when you need it and only with buffer sizes you want.

It turned out quite simple, and the following basic example Arduino sketch illustrates the principle:


 1 /* -*- Mode: C; tab-width: 2; indent-tabs-mode: nil -*- */
 2 
 3 /* (c) 2012 Joost Yervante Damad <joost@damad.be> */
 4 /* License: GPL3+ */
 5 
 6 static HardwareSerial<HARDWARE_SERIAL, 0, 16> MySerial;
 7 
 8 void setup()
 9 {
10   MySerial.begin(31250);
11 }
12 
13 static uint8_t c = 0;
14 void loop()
15 {
16   delay(50);
17   ++c;
18   MySerial.write((char)c);
19 }

In line 6 I instantiate the HardwareSerial instance. It has 3 template parameters:

  1. HARDWARE_SERIAL: this indicates we want the first hardware serial of the microcontroller. This is used to differentiate the underlying ports, etc at compile time. On an Arduino Mega you could also use HARDWARE_SERIAL1, HARDWARE_SERIAL2 or HARDWARE_SERIAL3.
  2. 0: This is the receive buffer size. In this case it is 0 meaning we don't want to receive anything and won't waste any bytes on a buffer. As an added bonus the interrupts for receiving will not be enabled.
  3. 16: This is the transmit buffer size. The test program is only sending single bytes, so we could even use 1 here!
I like how it turned but I fear it is a bit too complex to be part of the official Arduino tree.

The code can be found in github at:


Friday, October 12, 2012

software serial, a possible alternative implementation

(All code on this page is (c) 2012 Joost Yervante Damad and licenced under the GPL version 3)

Everybody at some point at least temporary needs more serial interfaces  on their Arduino/ATMega/... micro-controller.
The usual solution is to use the software serial library. The existing implementations have some serious limitations so I'm working on an alternative solution.

First let's have a look at the existing ones and their features and limitations.

Before Arduino 1.0 there was a version which I will call "Old Software Serial".
Starting with Arduino 1.0 a library called "New Software Serial" was integrated.

Old Software Serial


This was written in 2006 by David A. Mellis.

Sending is done via setting the transmit pin HIGH and LOW and  the timing of the bits is done by means of the "delayMicroseconds" call which does busy looping.

Receiving is done by calling the "read" function which will busy wait for the start of the byte and then read the bits where the timing between the bits is again done via delayMicroseconds.


It does not use any interrupts.


This works but has severe limitations:

  • sending data keeps the CPU busy
  • receiving data also keeps the CPU busy
  • if your program is not actively reading at the right time you will loose bytes
  • only one instance can be active at once as reading is done in the main program

New Software Serial


This started it's life as AFSerial done by Lady Ada from Adafruit industries. It was then picked up by Mikal Hart from Arduiniana and there were bugfixes and improvements by various other people (Paul Stoffregen from the Teensy, ...) In Arduino 1.0 it was integrated as the "SoftwareSerial" library.

Sending works basically the same as in the Old Software Serial.

Receiving is interrupt based.
The receive pin is registered for pin change interrupts. This means every time the pin changes from LOW to HIGH or the other direction an interrupt is called.
In practice when a pin change happens and it is a HIGH->LOW transition this indicates a start bit and then the byte is read by means of short delays implemented via a busy loop. The byte is then inserted into a circular buffer. Reading from the main program just reads from that buffer.

The big improvement here is that reading does not require blocking the main program. 

This works better then the Old Software Serial but also has limitations:
  • sending data still keeps the CPU busy
  • it only supports one active receiver; you have to change the active receiver with the listen() call if you have multiple instances of SoftwareSerial (this is actually a limitation caused by how reading a byte works)
  • reading a byte BLOCKS busy looping within the interrupt handler
That last in particular is quite nasty. It means that while the library is reading a byte, no other interrupts can be handled. This Includes interrupts for a receive of another software serial instance or even another hardware serial interface! Normally the goal should be to have interrupt handlers do as little as possible.

JD Software Serial


Giving comments on other people's code is easy so let's put my money where my mouth is and try to come up with a better solution.

For now I'm focusing on the receive part, for the sending part I have some ideas about as well, but that is not that important as sending doesn't block interrupts and people expect it to be synchronous.

The basic idea is to also use the pin change interrupt, but instead of blocking to read an entire byte, look at the HIGH->LOW and LOW-HIGH transitions and the timing of when they happen and find out the bytes like that.

This approach also has some shortcomings and caveats, I'll get to that later.

A first try


First I'm going to write a simple interrupt handler that just puts the transitions in a 32bit circular buffer annotating each bit with it's timestamp. All this code is not optimized it is just to do some playing with the concept.

The type for the buffer and data fields for the interrupt:

 1 typedef uint32_t stamp_t;
 2 typedef struct {
 3   bool rise;
 4   stamp_t timestamp;
 5 } bitchange;
 6 static bitchange bitchanges[32] = { { 0,0 } };
 7 static int datapos = 31;
 8 static int freepos = 0;
 9 static volatile uint8_t * receivePortRegister = 0;
10 static uint8_t receiveBitMask = 0;

The interrupt handler:

 1 inline void handle_interrupt()
 2 {
 3   // if our bit change buffer is full, just drop this bit
 4   if (datapos == freepos) { return; }
 5   const uint8_t pin_data = *receivePortRegister & receiveBitMask;
 6   bitchanges[freepos].rise = pin_data > 0;
 7   bitchanges[freepos].timestamp = mytimer();
 8   freepos = (freepos + 1) & 31;
 9 }
10 
11 ISR(PCINT0_vect)
12 {
13   handle_interrupt();
14 }

The mytimer() function uses the timer0 facility which is already in use by the Arduino core. It uses the lower 24 bit of the timer0 overflow counter together with the fast changing content  of the TCNT0 register.

1 extern unsigned long timer0_overflow_count;
2 static inline stamp_t mytimer() {
3   const stamp_t ov = (timer0_overflow_count & 16777215l) << 8;
4   const uint8_t t = TCNT0;
5   return ov+t;
6 }

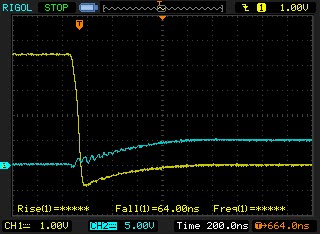
My setup uses two Arduino boards. Arduino one is sending a 'U' every second on it's TX pin, meaning it is using the hardware serial. It is clocked at 31250 baud.
That TX pin is connected to pin 2 on the second Arduino. The second arduino is connected with it's normal serial interface to a PC via USB at 115200 baud.

The setup. On the left the sender, on the right the receiver. Data is going via the green wire.


To get started I just look at the bit transitions in a busy loop.

 1 void loop()
 2 {
 3   if ((datapos + 1)%32 != freepos) {
 4     const bool rise = bitchanges[datapos].rise;
 5     const stamp_t timestamp = bitchanges[datapos].timestamp;
 6     ATOMIC_BLOCK(ATOMIC_RESTORESTATE) {
 7       datapos = (datapos + 1) & 31;
 8     }
 9     Serial.print(timestamp); Serial.print(' ');   Serial.println(rise?'1':'0'); 
10 }

That works fine. Evert time it sees a byte it prints:

11835708 1
12085644 0
12085652 1
12085660 0
12085668 1
12085676 0
12085684 1
12085692 0
12085700 1
12085708 0

First line is the stop bit of the previous byte.
Second line is the start bit of this byte.
The remaining lines are the data bits.
The data bits give 10101010 which is LSB (Least significant bit) to MSB (most significant bit) meaning it represents 01010101 which is 0x55 which is 85 decimal which is the character 'U'. Now the reason I'm using that particular byte is that it has an edge on every bit, which makes it an easy case.

In general there are a couple of special cases:

  1. two or more times the same bit in one byte
  2. initially starting out in the middle of a byte
  3. ending with one or more HIGH bits meaning there is no stop bit interrupt
1 is easy to fix: just look at the time-stamps and insert extra bits with the previous bit value. The amount of bits can be determined from the difference of the current time-stamp and the previous time-stamp.
2 just implies that we need to be clever in trying to find the start bit in an existing stream.

3 is the tough one. The solution I'm implementing is that when a start bit is received and I was actually still expecting a data bit the remainder of the bits are filled with HIGH because that is what they might be.
However that does mean that the byte is only known when the next byte starts, which could be quite late. In practice though for the typical ASCII values this is not an issue as the MSB is 0, and the stop bit is always seen.

Get those bytes


Let's give decoding the bytes a stab. After quite some testing/tweaking I came with the following test code that nicely dumps the received byte and works for the whole 0 till 255 (0xFF) range:

 1 void loop()
 2 {
 3   if ((datapos + 1)%32 != freepos) {
 4     // first get data out of array
 5     const bool rise = bitchanges[datapos].rise;
 6     const stamp_t timestamp = bitchanges[datapos].timestamp;
 7     // only then update datapos to avoid getting overwritten data
 8     ATOMIC_BLOCK(ATOMIC_RESTORESTATE) {
 9       datapos = (datapos + 1) & 31;
10     }
11     // Serial.print(timestamp); Serial.print(' '); Serial.println(rise?'1':'0');
12     if (want_start) {
13       if (!rise) {
14         if (start_delay > 0) {
15           const stamp_t d = stampdiff(timestamp, prev_ts);
16           if (d < start_delay) {
17             // to soon, skip
18           } else {
19             want_start = false;
20             bit_count = 0;
21             recv_byte = 0;
22             start_delay = 0;
23             //Serial.print('T');
24           }
25         } else {
26           // \/ we actually receive what could be a start bit
27           want_start = false;
28           bit_count = 0;
29           recv_byte = 0;
30           //Serial.print('S');
31         }
32       } else {
33         //Serial.print('Q');
34         // /\ probably a stop bit; just discard and wait for next start
35       }
36     } else {
37       // we are receiving a byte
38       const stamp_t d = stampdiff(timestamp, prev_ts);
39       // Serial.println(d);
40       if (d > 80) {
41         // if it takes to long to get a bit, the byte has ended
42         if (!rise) {
43           // \/ we find what is possibly a new start bit
44           // this means we need to fill the remaining bits with
45           // /\ meaning a 1
46           const int num_bits_remaining = 8 - bit_count;
47           // Serial.print("+"); Serial.print(num_bits_remaining); Serial.print('-');
48           for (int i = 0; i  < num_bits_remaining; ++i) {
49             recv_byte >>= 1;
50             recv_byte += 128;
51           }
52           Serial.print('$');
53           Serial.println((int)recv_byte, HEX);
54           want_start = false;
55           bit_count = 0;
56           recv_byte = 0;
57         } else {
58           // /\ we're out of sync, restart
59           //Serial.println('*');
60           bit_count = 0;
61           want_start = true;
62           start_delay = 80;
63         }
64       } else {
65         // new edge within the same byte
66         // if the edge comes after double the expected time or more
67         // we've skipped a bunch of bit of the previous value
68         const int8_t prev_num_bits = ((d+1) / 8) - 1;
69         // Serial.print("+"); Serial.print(prev_num_bits); Serial.print('-');
70         // push previous bits
71         for (int8_t i = 0; i < prev_num_bits; ++i) {
72           recv_byte >>= 1;
73           recv_byte += rise ? 0 : 128; // inverse of what we're going to now
74           // Serial.print(rise ? 'O' : '|');
75           ++bit_count;
76         }
77         // push current bit
78         if (bit_count < 8) {
79           // Serial.print(rise ? '1' : '0');
80           recv_byte >>= 1;
81           recv_byte += rise ? 128 : 0;
82           ++bit_count;
83         }
84         if (bit_count >= 8) {
85           // we reached the end of the byte
86           Serial.print('#');
87           Serial.println((int)recv_byte, HEX);
88           want_start = true;
89         }
90       }
91     }
92     prev_ts = timestamp;
93   }
94 }


This actually somewhat works :)

Now comes the tough part to rework it to do the byte decoding in the interrupt handling and work with a circular buffer like New Software Serial. After that it needs to be optimized.

Also tables need to be made to accommodate different baud rates then the fixed 31250 baud used here.
An interesting thing is that because I'm already looking at time-stamps anyway, implementing auto-baud should not be hard!

Another future addition could be to actually sample the pin a second time shortly after the first time and if it's not the same discard the bit. This would work as a simple noise filtering.

To be continued in the near future!

Saturday, September 29, 2012

Dimming a 12V LED strip with a mosfet and PWM, part 3

This is part 3 and for now the final part of this series of posts on my experiment with using a mosfet for dimming a 12V LED strip as the strip is going to be used for lighting up my soldering desk (undimmed).

In part two I found that using a 100nF snubber capacitor filters out the Drain-Source ringing. However I noticed a large drop in Drain voltage from the expected 12V when the mosfet is disabled. As last time, K made an interesting comment,  this time that the circuit seems seriously overdamped.

Let's try and actually use the formulas K mentions in the comments and which can be found in the article Calculating Optimal Snubbers.

The datasheet for the IRF540 mosfet shows a Drain-Source capacitance of 375pF (C) at 12V.
Assuming a ringing time (T) of 200ns and using the formula T=2*pi*sqrt(L*C) gives a parasitic inductance of 2.2uH.

This gives a snubber resistance R=sqrt(L/C) ~= 100Ω. With C=T/R this gives a snubber capacitance of 2.2nF.
100Ω 2.2nF snubber
The snubber does give a damping effect, but still a nasty initial peak of 30V.

Remeasuring the period shows actually more in the direction of 400ns. Recalculating like above gives 10uH parasitic inductance. The snubber gives 190Ω and 1nF.

190Ω 1nF snubber
Note that I changed the vertical scale of the blue line to 10V. This means we have a nasty spike of 36V, which is definitely worse.

As this still doesn't look very well I started playing with values.

47Ω 1nF

0Ω 4.7nF snubber (blue 10V scale)

0Ω 4.7nF snubber (blue 5V scale)


0Ω 3.3nF snubber
0Ω 10nF snubber
As you can see increasing the capacitance reduces the peak, but also reduces the end voltage below the expected 12V.

I finally settled for the 0Ω 3.3nF snubber. It gives some minimal ringing but stays near 12V. As it requires no resistor there is no resistive loss.

Measuring the power usage shows no significant difference between the snubbed and plain circuit. I still think that some parts of the story have not been revealed here. Maybe in a future blog post...


Thursday, September 27, 2012

Dimming a 12V LED strip with a mosfet and PWM, part 2

In a previous post I looked at PWM dimming a 12V LED strip. Time to revisit this with some new insights. So I saw bad ringing at turn-off of the mosfet. According to K the noise is caused by the capacitance of the Drain-Source of the power mosfet in combination with the inductance of the load. This makes sense as I already figured out that changing the load influenced the ringing.

Let's do a proper "snubber". (Not "shunt" as I called it last time).

I'm re-measuring with the gate voltage on the yellow channel and the drain voltage on the blue channel of the scope. Notice that the blue channel has a 5V per division scale and the yellow one 1V per division.

no snubber
 Without snubber that looks absolutely horrible.

Second lets add a 100nF capacitor from drain to VCC like I did in the previous post.

"snubber" cap to VCC

That is with a "snubber" cap to VCC, which arguably is not really a snubber at all.

Finally, lets really add the snubber over the Drain and Source of the mosfet, which means Drain to ground as the Source is directly connected to ground.

snubber cap across drain-source
That looks nice!
There is still some high frequency noise (~20Mhz) but it has a very low amplitude.

Let's go back to the initial situation, is it really a problem? I guess with the mosfet I'm using (IRF540), not really. It has a Drain Source breakdown voltage of 100V, and the largest peak I notice is 40V. On the other hand that might just go past the breakdown voltage of the LEDs on the LED strip and that is not a good thing either.

A curious thing is that in the non-snubbed circuit the drain voltage goes all the way up to almost 12V and in the snubbed circuit it only goes up to 5V. It looks like the LED strip in combination with the snubber acts as some kind of impedance divider.
If  I change the snubber from 100nF to 1uF (10x larger) the peak voltage on the Drain drops to 4V. Changing it to 50nF raises the peak voltage to 6V.

Something to ponder about...

fixing things with sugru

Sugru is air-curable silicone rubber. It is easily shape-able by hand and cures in about a day. It stays good for about 6 months in the original packages, but I store it in the fridge where it will stay good a bit longer.

Etching tank

When I'm not etching I want to store the etchant away in a safe place. I use glass jars stored in a hazardous materials container for that. The tricky thing is to pour the etchant from the tank into the glass jars without spoiling any as it is both toxic and corrosive. The tank being rectangular in shape makes this nearly impossible.

The solution: a sugru-made (I mixed two colors here) round shaped high side-walled  pouring guide.


A test run with water show it works great. Not a single drop of spill.

Screw protector

This is actually something fixed by Isabelle. One of the screw protectors in the horse trailer got missing and she was worried her horse might injure herself on the exposed screw. Some sugru to the rescue!

On the right the normal screw protector, on the left the sugru fix.

Fridge

One of the knobs to keep a panel in place in the fridge had broken off. We probably overloaded that particular part in the panel, although it is also arguably a week construction. It is fixed with sugru and seems to hold until now, although we also re-organized the fridge to get a better weight distribution. Sorry for the unclear picture but I didn't feel like taking the fridge apart again.


Conclusion


Sugru is handy stuff! Highly recommended to have some off it in your house, especially as it allows you to easily fix things you might normally just throw away and buy anew. Less waste is good!

Sunday, September 23, 2012

Dimming a 12V LED strip with a mosfet and PWM

Dimming a 12V LED strip with an N-channel power mosfet is pretty straightforward. In this experiment I'm using 5 meter of cool white LED strip running at about 800 mA giving 10 Watt.

the basic setup
 An Arduino Duemilanove (my trusty lucky white one) is used to provide pulse with modulation ( PWM ). Digital pin 9 and 10 (also known as OC1A and OC1B) are used. They both use the Timer2 facility of the atmega328p microcontroller which means I can have them output exactly the same PWM signal. Digital 9 is used to drive the mosfet and digital 10 is only used for displaying the unloaded PWM signal on the scope.

Basic PWM setup schematic


PWM on the scope
On the scope you can see the yellow PWM signal driving the mosfet and the blue one that is not connected to any load.

The following Arduino sketch does a simple PWM sweep in 10 steps per second:

 1 void setup()
 2 {
 3   pinMode( 9, OUTPUT);
 4   pinMode(10, OUTPUT);
 5 }
 6 
 7 byte b = 0;
 8 
 9 void loop()
10 {
11   analogWrite(9, b);
12   analogWrite(10, b);
13   delay(100);
14   ++b;
15 }

This gives a PWM signal as shown in the (crude) video below.


Not shown in the video is that this also nicely dims the LED strip.

This is actually good enough for simple dimming, but lets look at it more in detail. More specific lets look at the rise and fall of the PWM signal at the gate of the mosfet.

a detailed look at the voltage at the rising edge at the gate of the mosfet

Whats interesting to see is that it takes about 600ns in total to go from 0V to 5V at the mosfet gate.
The first sharp rise is from 0V across the threshold voltage of the mosfet to the Miller plateau voltage and takes about 100ns. At this point the current through the mosfet is already at the peak but the voltage across the mosfet from drain to source still has to drop from the 12V it starts at. This drop happens across the relatively flat part of the peak in the middle called the Miller plateau region. After this drop the Drain-Source voltage for this particular mosfet will be a bit above 150mV and the remaining 11.85V will be across the LED strip. Finally the voltage at the gate rises to 5V which will slightly lower the on-resistance of the mosfet and the final Drain-Source voltage should be about 100mV.
As mentioned all this takes about 600ns which is not very fast. Looking at the specification of the IRF540 mosfet a rise time of about 35ns should be possible.

I got quite some interesting info concerning mosfet gate drivers from this Texas Instruments paper.

The basic idea to get a faster transition is driving more current in the mosfet gate then the measly 50mA that the digital pin of the Arduino/atmega is capable of providing.

One solution suggested by the paper is to use a Bipolar totem-pole driver. The idea behind that is that by using the very fast operation and large gain of bipolar transistors the gate can be charged and discharged quickly.

adding the bipolar totem-pole mosfet driver 
When the PWM signal is high the NPN transistor is on and the PNP transistor is off. This allows a large current to flow from the 5V power supply and the tank capacitor C into the mosfet gate.

PWM high and NPN on
When the PWM signal is low the PNP transistor is on and the NPN transistor is off allowing for a quick sink of the charge on the mosfet gate into ground.

PWM low and PNP on

For the transistors a BC639 NPN and a BC640 PNP do the job. R is 3.3Ω. RB is 22Ω. RGATE is 4.7Ω. C is a big 1000μF electrolytic.

final setup
improved rise time
A rise time of 44ns using the bipolar totem-pole driver is not bad at all.

Lets take a look at the other side of the wave form.

fall ringing
There is some nasty ringing on the fall side of the pulse. This won't affect the dimming but it's interesting anyway to take a look what is happening.

First thing I checked is RGATE. Increasing the resistance off RGATE does lower the ringing but it also kills the just gained speed improvement.

Then I noticed something weird: if I unrolled part of the LED strip the peaks of the ringing got larger. I then replaced the LED strip by a single LED and surely the ringing is all but gone.

I assume the capacitance/inductance of the 5 meter LED strip and/or all its LEDs cause the ringing.

Adding a shunt resistor across the LED strip lowers the amplitude of the ringing but it requires quite a low ohm resistor which in turn gets very hot when there is 12V across it, and it wastes a bit of energy.

Measurement with the scope shows that the ringing is at about 3.5Mhz. A simple shunt capacitor of 100nF should nicely act as a low-pass filter. If we presume a parasitic resistance of 1Ω, using f = 1/(2*pi*R*C) gives about 1.5Mhz cut-off frequency for the filter.

schematic with CSHUNT added


with 100nF filter
That certainly looks nice. I still don't think it is more then aesthetics though..

 I'd love to hear comments on this! Either here or on G+.

Sunday, June 24, 2012

a LED retrofit

Context


A couple of months ago a friend of me come to me with an interesting problem. He has some old lamps that run on 12V and use small halogen lamps. The problem with these lamps is that they're fragile and are getting more and more rare to get. This also makes that these lamps get more and more expensive.
The idea is to make a LED replacement that fits in the existing housing.

LED


I wanted to get enough light to have descent illumination. About 200 lumen should be good.
I ended up choosing the Osram Golden Dragon + LED LW W5AM-KXLX-5K8L. I first used a 5600K white LED which can handle up to 1A of current and gives 100 lm at 350 mA. I used two of those running them at about 350 mA giving about 200 lm. Running them at 350 mA means that the LED runs relatively cold and nicely within specification. Accidentally it is also the place where the lumen per mA curve has it's peak.


After testing the the 5600K white LEDs we decided that a warmer color temperature would be nicer. The 3500K warm white Osram LCWW5AM-JXKX-4O9Q still gives a nice 82 lm at 350 mA. They cost about 2.5€ a piece.

A simple 110° twist on lens completes the LED. (Intelligent LED solutions FL-70)

Driver


Chosing a LED driver is not easy mostly because there is so much choice.


I ended up choosing the National (Now TI) LM3407 buck LED driver. These are the key reasons for this:

  • easily solder-able eMSOP package should pose no problem hand soldering
  • build-in FET and minimal external parts required
  • 92% efficiency when powering 2 LED from 12V
  • good readable specification with all the calculations clearly provided
  • will work with the existing 22 uH surface mount inductors I have lying around from earlier experiments
After I started working with them I noticed this chip as a very nice surprise feature. It contains an internal 4.5 voltage regulator. The specifications say you're not supposed to use it but I figured drawing ~ 100 uA from it shouldn't be that bad. This means I can add a small dimming circuit that drives the PWM pin of the driver IC and have nice dimming.

This is the basic driver circuit:


It is a quite simple buck driver. The diodes are actually fast skottky diodes.
The 0.56Ω current sense resistor programs the driver for 350 mA.
The 82.5kΩ resistor programs the buck switching frequency at 525 kHz. 
The DIM and VCC pins are connected to the dimming circuit.

Dimming


The dimming is done by means of a 1M linear potentiometer. A simple CMOS 555 based circuit converts the potentiometer setting into a PWM dimming signal. I choose the 555 components to have a 500 Hz PWM frequency and a minimal current usage. One odd thing about the specific 555 I'm using (ST TS555IDT) is that it doesn't have a dot that indicates pin one. One side of the IC is slightly curved which is the only orientation hint.


On/Off


In order to have the circuit use really no power when it is off I use a potentiometer with a build-in switch, like used to be done with radios where you turn then off by completely turning down the volume.


The design


There are some oddness there mostly due to being a single sided design but it works fine.


The etched PCB, with the LM3407 already soldered on:


The fully populated PCB:


Mounted in the base of the case:


The result


It turned out pretty good. It is also very nice that it uses very little (only a few miliwatt) of power when the LED is minimally dimmed and it still gives a nice dimmed illumination.

Fully off:


Fully On:


Half-dimmed:


Almost completely dimmed:


Possible improvements


I think the knob is a little big, I should look into a smaller solution for that.

Monday, April 30, 2012

shipping of electronic parts from USA to europe: UPS vs DHL/FEDEX

When buying electronic parts it sometimes is cheaper to buy in the USA. There are some caveats concerning shipping though.


UPS

While sometimes a bit cheaper (but I usually end up with free shipping because I cluster my buys), there is one very big drawback, and that is import tax.
With UPS you have to pay the import tax in cash to the driver. Because you don't know the exact amount at order time you have to guess how much money you need to have in house and then some more because the driver usually can't give change back.

DHL & FEDEX

With DHL & FEDEX you don't pay the import tax to the driver, you get a separate bill via snail mail, which you can pay via a normal wire transfer. Much better!

Consequences


That being said, this starts to influence my buying choices. For example digikey usually ships with UPS, while mouser allows me to choose FEDEX, which makes mouser my preferred choice for buying parts from the USA.

When buying in Europe it doesn't matter so for farnell and rsonline I don't mind either. If I can buy at either of those I still prefer that but both digikey and mouser have a somewhat larger and different selection.

Others


I basically buy most parts at those 4, and sometimes sparkfun or one of sparkfun's resellers of course. Are there any other shops you recommend ?

Thursday, April 26, 2012

3D printing a LED diffuser directly on PCB

"3D printing a LED diffuser directly on PCB"

Yes, it is possible. Hence this quick blog post.


This lamp is a simple proto PCB with a whole lot (>30) of high brightness 0603 white LEDs soldered on them with a few layers of 3D printed yellow PLA on top of them.

I had to add some DRAM heat-sinks to the back to deal with the massive heat production, especially given that PLA gets liquid at relatively low temperatures. Light production is quite poor, but it is cool for mood lighting.

To be continued.

Sunday, April 1, 2012

3D printing and openSCAD

Yesterday, March 2012, I gave a short talk about 3D printing and openSCAD at Newline^2, the conference at 0x20.

The slides and embedded pictures are available under the Creative Commons Attribution-ShareAlike 3.0.

Click here to get them as PDF.

Saturday, March 10, 2012

Arduino, limited RAM and PROGMEM

And so I was happily adding more and more descent error handling code to a piece of code running on an atmega328p (the Atmel AVR micro-controller also typically used in Arduino). And then the thing started acting up. Now I've had that happen to me before so I immediately thought that it was running out of RAM.

The atmega328p has 32k flash, which is typically plenty, but it has only 2k RAM, which is not very much at all.

I was doing things like:

Serial.println("FAIL invalid argument");

Now, you might be thinking, why does it have to store the "FAIL invalid argument" in RAM?
It has all to do with how braindead C/C++ is/are.

"FAIL invalid argument" is a "const char *" which although it seems read-only it actually isn't (and no "const char const *" isn't either).
Thing is in C it is perfectly legal to cast away any types and just start changing characters in the string.
And the compiler can't know you're not doing that as you could be doing it via some very scary indirect pointer arithmetic to get to the characters in the string.

Bottom line is that every "constant" string in the code is copied to RAM because it could theoretically be used.

Now, on to PROGMEM.

It is a way to use strings directly as contained in the program code, but without the copying to RAM.

Okay, I'll first give the short answer which works fine on arduino 0.22 or newer:

Serial.println(F("FAIL invalid argument"));

This does some casting and other magic in the back and does the right thing.

Just for educational purposes lets take a look how to do it without arduino tricks.

the <avr/pgmspace.h> header contains a useful macro, called PSTR which looks like we could use it just like this:

Serial.println(PSTR("FAIL invalid argument"));

Unfortunately that doesn't work. PSTR returns a PROGMEM pointer and it turns out (even though the atmega has a flat address space) we can't use PROGMEM pointers just like regular pointers.

It will nicely compile and give garbage.

The only way is copying the data from PROGMEM to RAM and then using it.

This could be done byte-by-byte with pgm_read_byte (this is what arduino does internally, take a peek in arduino-1.0/hardware/arduino/cores/arduino/Print.cpp ) or to a buffer in RAM with strcpy_P.

All this is quite awkward and error-prone and makes me long for a nicer language for microcontrollers ;)

Friday, January 20, 2012

arduino mega and multiple hardware serial devices

For a project I use an arduino mega (Atmel AtMega1280 8-bit micro-controller to be precise)  to access multiple other hardware devices via hardware serial.

I'm running the Arduino stack on the hardware, more specific the arduino 1.0 release.

Now the atmega1280 (or atmega2560) has 4 hardware serial devices (called Serial, Serial1, Serial2, Serial3 in arduino) so using multiple serial devices is easy eh?

Not really.

For one use case I have a device connected on Serial1 at 57600 baud.
I want to be able to route serial traffic from that device to the Serial device connected to the PC.

Sounds easy enough, the follow arduino sketch does the job:

void setup(){
  Serial.begin
(57600);
  
Serial1.begin(57600);}
void loop() {
    
// from external device to serial console
    
if (Serial1.available() > 0) {
        
byte incomingByte = Serial1.read();
        
Serial.write(incomingByte);
    
}
    
// from serial console to external device
    
if (Serial.available() > 0) {
        
byte incomingByte = Serial.read();
        
Serial1.write(incomingByte);
  
}
}


Thing is, for short messages this works fine. However for longer messages only one direction is stable, the direction from the external device (Serial1) to the serial port (Serial).

I could run the serial port (Serial) at a slower speed then the device (Serial1). However then the other way around will start to drop bytes!

Let's have a look at HardwareSerial.cpp as provided in the arduino distribution.

It seems to work with an RX and TX buffer for each hardware serial device.

#define SERIAL_BUFFER_SIZE 64

Maybe that buffer is not large enough. The AtMega1280 I'm using has 8K SRAM and thats quite some more then I need. Let's double the buffer.

#define SERIAL_BUFFER_SIZE 128

Surely the behavior is somewhat better, but it is still dropping bytes in one direction.

Let's have a look at the write function.


size_t HardwareSerial::write
(uint8_t c){
  
int i = (_tx_buffer->head + 1) % SERIAL_BUFFER_SIZE;
  
  
// If the output buffer is full, there's nothing for it other than to
  // wait for the interrupt handler to empty it a bit
  // ???: return 0 here instead?
  
while (i == _tx_buffer->tail)
    ;
  
  
_tx_buffer->buffer[_tx_buffer->head] = c;
  
_tx_buffer->head = i;
  
  
sbi(*_ucsrb, _udrie);
 
  
return 1;}


Look and behold:

while (i == _tx_buffer->tail)
    ;

it's a busy loop! If Serial1's transfer buffer is full the entire micro-controller will block and this keeps happening all the time.

The solution I introduced is only move data from one serial device to the other when both are ready. One should be readable (available() in arduino jargon) and the other should be writeable.

A writeable function is not available in Arduino so I added the following method to the HardwareSerial code:


bool HardwareSerial::writeable(){
  
int i = (_tx_buffer->head + 1) % SERIAL_BUFFER_SIZE;
  
return (i != _tx_buffer->tail);}


The loop from the sketch now looks like this:

void loop() {
    
if (Serial1.available() > 0 && Serial.writeable()) {
        
byte incomingByte = Serial1.read();
        
Serial.write(incomingByte);
    
}
    
if (Serial.available() > 0 && Serial1.writeable()) {
        
byte incomingByte = Serial.read();
        
Serial1.write(incomingByte);
  
}
}


This helps in the sense that it smooths the flow between the serial devices.

No more dropped bytes!